Monday, December 6, 2021

Baboons in the Apple Orchard


Baboons in the Apple Orchard

Today, I want to share a bit of what has been happening in my online game of Runequest: Roleplaying in Glorantha. One of the best aspects of the RPG community is the ability to share our experiences and inspire each other with our stories of, "What happened in my game". Even if we are all playing through the same adventure, each group has different experiences and stories to tell that are fun and worth sharing - that might be something inspiring for something new. Though this post is not about an adventure or module that my group played through, but rather what happened recently between adventures. But hopefully, it can inspire you for your game nonetheless.

Between Adventures in Runequest: Roleplaying in Glorantha, is a whole chapter of the core book for anyone reading this who hasn't yet read the whole core book of the game or who hasn't played the game yet. In the chapter, it goes over how to make your experience checks and how to train your abilities; either through self-guided learning, from an instructor, research, or in the case of POW - through worship and meditation. The players can choose what they want their characters to improve or learn from season to season when they are in between adventures. Some of these improvements take a week at a time, some others take a season or more to improve. At the end of each season, I ask my players what they plan on making any improvements or train in anything for the coming season(s).   

Because the adventurers are members of a community and have other commitments, unlike the average D&D character. They often spend a lot of time pursuing their professions back home, as well as, fulfilling other responsibilities to their cult, clan, tribe, and kin. So Between Adventures is an important moment, in my mind, to help communicate to the players their connections to their community. And I have my own set of random roll tables to help give these moments a bit more life and possible drama. Essentially, I make a series of random rolls to see if anything interesting happens during each week when the heroes are not on an adventure; either an event that happens to them or to someone they know. But I will get more into how I do this in a later post. it's not relevant for today's post.

Some groups like to handwave the in-between adventure stuff but I like to at least play through them a little bit. So the following is one such situation that arose during our recent in-between adventures moments. I will also say that this situation is based on one presented as an Adventure Seed in the back of the GM's Adventure book. Which only gives you the broadest strokes of the situation and leaves all the details up to the GM.

Irilla and the Baboons

The group had just finished the Smoking Ruins adventure and had been back in Apple Lane for about three days; this would not be the last time they will be sent to the Smoking Ruins. A caravan came through Apple Lane and along with this caravan was Irilla of Esrolia, daughter of Gringle who has traveled from as far away as Gryphon Mountain to lay claim to her father's abandoned business and the hides of lands that were in his keeping, given to him by Prince Tarkalor. She met with the Elders of the community to present the scrolls and items given to her to prove her identity, and scroll and item from her father, Gringle, and a scroll from Queen Samastina of Esrolia. 

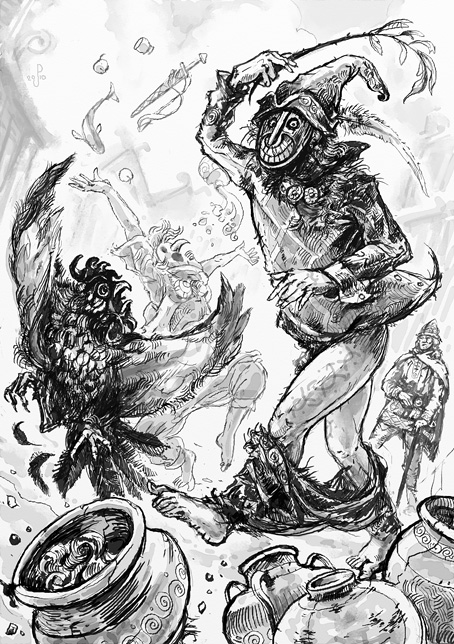
While this stranger, who was claiming to be a member of this hamlet met with the elders, a troop of Baboons showed up at the market that was formed around the Issaries shrine of Apple Lane. There are two types of baboons in Glorantha, the ones like the earth baboon, and then there are the 6ft+ tall talking Baboons that come from around Prax. This troop was the latter and their appearance was a call back to the original Apple Lane adventure. They talk very little trade talk, and what little they do speak is very rough and disjointed. They showed up making demands but then spotted the Local Shaman - who was a member of the Daka Fal cult, who was here with his apprentice (one of the players) in search of hard-to-find herbs and such he would need for his work. The Baboon troop's leader made a beeline for the Shaman, asking for the shaman to tell them where the thief Gringle was. That they demanded Gringle be given over to them.

It should be noted that very few people in the hamlet at the time that the Baboons showed up, know that Irilla exists let alone is in the hamlet. The only people who know this are the elders and a retainer to the thane of Apple Lane (one of the player characters); who were elsewhere in the hamlet speaking with Irilla and trying to decide if she is who she says she is. So with that in mind, the shaman and his assistant were trying to get the Baboon leader to understand that Gringle hasn't been in Apple Lane for at least the last 5 years, but the Baboon wasn't buying it. The Baboon leader told them that Grandfather Baboon told them that Gringle was here with that of which he had stolen from them. There was some confusion involved with this conversation due to the Baboons talking about a Grandfather Baboon - which later was revealed to be what they call Daka Fal. So seeing how the Baboons were not going to take his word for it, the Shaman had his assistant (the one player character) lead the Boboon leader and a few of his troop to where the ruins of Gringle's shop still stands so that the baboon could see with his own eyes the truth of the situation.

Once outside the old shop, which is a burned-out old building that stands as a testament to Sartar under Lunar rule, the lead Baboon began yelling in bad Trade Talk. He demanded that Gringle come forth and return what he has stolen from them. This is the moment when the Elders of Apple Lane were ready to accept Irilla as who she says she was, after having the local Lhankor Mhy scholar look over the various scrolls. But with all the yelling coming from nearby they paused their decision to see what was commotion was. During this moment as well, Irilla was over in the Tin Inn waiting for the Elder's decision, speaking with the retainer (one of the other players) and Brightflower. Upon hearing the commotion from outside, the retainer asked everyone in the Inn to stay inside while they went outside to see what was going on. The Retainer and the Elders all came out at the same time to see the Assistant Shaman standing awkwardly off to the side while a big Baboon was yelling at an empty, old, burned-out shop.

This went on for some time during which several things happened. First, the Assistant Shaman told the various NPCs and Player characters what was happening. Second, the Thane approached the Lead Baboon and spoke to them with the help of the Assistant Shaman to translate. He further explained that Gringle wasn't in the village and hadn't been for a long time. He said nothing about Gringle's daughter though, who was still inside the inn during all of this. The thane then leads the Baboons inside the ruins of Gringle's Pawnshop to see firsthand that no one has lived there for years.

While the thane kept the baboons busy, the Elders of Apple Lane discussed amongst themselves the situation involving Irilla and the sudden appearance of the Baboons. It wasn't the first time that Baboons had been seen in Apple Lane looking for Gringle. Once the Baboons were placated, for now, and after they had left, the Elders all went inside the Inn to tell Irilla their final decision and to further discuss the Baboons. The Elders decided in the end to not accept Irilla as who she was and told her that if she wanted to push her claim then she should travel to Clearwine and present herself before Queen Leika Blackspear. If the Queen of the Colymar Tribe accepts her claim then they would as well. They then told her that until that time she would not be afforded any protection as a member of the hamlet. They made it very clear that the Baboons were the real issue here and were looking towards making sure that the community was made safe for the time being. 

This was the setup we started with for a situation that would last for the next 3 or so weeks during the current season (Sea Season) ingame. The Baboons camped a few miles away from the hamlet, off the main road, where they stop anyone traveling on the road to bother them about the thief Gringle. People who live in and around the hamlet and work in the Groves, occasionally reported seeing a Baboon scout or two in the hills watching the hamlet or looking to see if they can find where the thief Gringle was hiding. But no Gringle was to be found.

Irilla left Apple Lane the same day she arrived, hiring the heroes to escort her to Clearwine so she could speak with the queen and then gather whatever supplies she would need to rebuild her father's shop. She wasn't thrilled with the Elder's decision but at least understood their position.

After that, the heroes return to Apple Lane and continue with their daily lives, which was only interrupted by the occasional Baboon sighting or demands of giving over Gringle. None of this came to a head until this past week's game. After the return of Irilla, now full a member of the community - the Queen of the Colymar having accepted her claims - Irilla was very ready to start on the clean-up and rebuilding of her father's pawn shop. A few days after her return, at the very end of the season, the Baboons appeared once again to stand in front of Gringle's old shop demanding that Gringle would turn over what was stolen. However, this time a Gringle stepped out of the building. Irilla was inside at the time with some laborers, finishing cleaning out the years of dirt, grime, broken walls, etc when the Baboons came-a-calling.

The end result of which was Irilla telling them who she was and telling them that she was her father's representative in the area. If they wanted to make any deals or demands that they could present them to her. The discussion between her and the lead baboon, all done in trade talk, probably lasted about 5 minutes in total. Wherein they demanded that the Sharptooth that was stolen was returned and she told them that her father never stole from them and that if they wanted the Sharptooth then they would have to pay for it like any other customer. It took more time to explain that to a group of Baboons who have only a small bit of understanding of trade talks, in-game terms they had a 30% to their skill. In the end, they told her that her terms were unacceptable and that if the Sharptooth was not returned by the setting of the sun, then they would come to take it away from her, even if that meant from her corpse. 

Now you might, like a few of my players, be asking why doesn't she just give them the Sharptooth since it could lead to not only her death but also to possible harm to members of the community? The simple fact is that She is 100% correct. The Sharptooth wasn't stolen - this goes back to the original adventure in the old Apple Lane booklet. An adventurer acquired the Crystal Sharptooth from a baboon after being attacked and defending themselves. The Sharptooth was a treasure found after the battle was over. This adventurer continued their journey for a time and then sold the item to Gringle. So the truth is very important to Irilla as much as it was to her father. To just give the Sharptooth over to the Baboons would be to accept that it was gained unfairly and dishonorably. That it was stolen. Pair this with the fact that she is an Issaries cultist; to give in trade in such a way would be to go against her Cult beliefs. So she was very much against this idea when it was presented to her by the players.

The heroes and Irilla, after the Baboons left, went to the Thane of Apple Lane (who is a cousin of one of the Player Characters). In the thane's house, they discussed at length how best to resolve this situation. The thane is a warrior, but he is also a very honorable person with a strong harmony rune. He wanted to resolve this peacefully if at all possible; which would be in the community's best interests. He didn't want to have to revisit this issue in 10-20 years, for instance. So the players tried to find a resolution for all of this and they had time working against them, so any plan that would take time to get started was not an option.

In the original story of how Gringle came in possession of the Crystal Sharptooth, he bought it from an Adventurer for a fair price. This adventurer had encountered some baboons and fought them off. From one of the corpses, he found the Crytal Sharptooth. Now the way I was handling this situation was that the leader of the Baboons, who was told about the Crystal Sharptooth and how it was a family heirloom - wasn't told the full story. He was only told that his father before him, went west to retrieve the family heirloom from a merchant named Gringle who stole it. So for him, it was in fact stolen. That's his truth. Anything that says otherwise would call his ancestor a lier. He probably wouldn't react well to this. The lead Baboon is very prideful.

How Did the Heroes Save the Day?


I, the GM, let the players try to come up with a plan, answering questions or giving them information that they didn't have or that they didn't remember but that their heroes would know. Their first reaction was to go to the Baboon's camp and just attack them before the Baboons could come and attack the hamlet. Irilla wasn't even sure the Baboons would go through with their threat and just wanted the retainers to guard her in the old shop, which was her home now. This would funnel the combatants in a closed space, at the very least. The heroes had been to the baboon camp before to speak with the Baboons in a previous week. With the help of Gooseberry Sprig, they got a rough count of their numbers, which was between 22 and 30 Baboons (when the Baboons came to Apple Lane they only ever came in a group of 6-8).

After hearing everyone's ideas the Thane of Apple Lane asked his cousin how much richer she had become from her recent journeys; an idea was forming in his mind. One of the other recent events came from the Prince of Sartar, Kellyr Starbrow, by way of a messenger from Queen Leika Blackspear - informing the Thane of Apple Lane to begin preparing for the coming campaign against the Lunars during Fire Season (setting up the battle of the Queens and running the Jonstown Compendium adventure "The Duel at Dangerford"). The players gave the thane a rough idea and also spoke about a few treasures they had found as well, some of which they didn't know how much they were worth. One such item, was an emerald necklace with an inscription on it. Irilla became interested in this item in particular but waited before revealing her interest. The thane told them, his idea was that they could appease Irilla and Issaries by purchasing the Sharptooth from her and then taking it to the Baboons. With it, they could possibly get the Baboons to make promises to join them on the campaign in the coming battles with the Lunar Empire. Irilla accepted this idea but only if they would trade the Sharptooth for the emerald necklace that they spoke of earlier. When asked why she wanted that necklace, in particular, she would only say that Issaries had given her a hunch that the necklace would be a worthy trade and could lead to further success down the road for her. 

By this point, my players didn't like Irilla. So they were suspicious of her and didn't accept what she told them about the necklace. They originally were waiting to find out if the necklace was an heirloom to a powerful or important clan or family in the hope to get more for it. So in this case, they suspected but had no proof that Irilla knew more about the necklace than she let on. So before, they would agree to trade the necklace for the Sharptooth they wanted her to give them any of the lunars that she gained from the sale of the necklace if it was greater than the stated price of the Sharptooth. She heard their concerns but said only that she would agree to make sure that any of the profit she made over that price from the sale of the necklace would be used towards the benefit of the community. 

They didn't love it, but they didn't hate it either. They nailed her feet to the floor as best as they could but in the end, they gave in and traded the Crystal Sharptooth for the emerald necklace. Then they followed the thane's plan and took the Sharptooth to the Baboons before the sunset, taking Gooseberry Sprig along to translate for them using beast speech, so that nothing was lost in translation. They brokered the deal while ensuring that the Baboons and the Sharptooth would not be an issue in the future. After making a few rolls on my side, The lead Baboon gave his promises, bound in the use of the names of the god important to each group, that he and the Baboons under his command would fight alongside the Coylmar Tribe in that years coming battles with the Lunars. The words used here are important. They would only fight by the side the Coylmar tribe. Fighting against the Lunars. Fighting only that year or what remained of it. This meant that if the Coylmar were not there, in any shape or form, then the Baboons would not go to fight. If the enemy wasn't under the Lunar banners then they would not fight for them at that battle. And come Sacred Time, the Baboons were no longer under this oath and could not be expected to follow it into the following year. 

All of this will make the coming season pretty interesting. 


Until next time, thanks for reading!

Friday, November 19, 2021

RuneQuest: Disordered thoughts on Disorder.

 Rune - DISORDER


Previously I talked about how Runes play a significant part in all aspects of Runequest: Roleplaying In Glorantha and how I want to explore the various runes so that I can use them in my own games as building blocks for storytelling. But I feel I should get to a good understanding of each rune so that each rune can be used as a building block for storytelling to its fullest possibilities. So to start things off with this series of explorations, I decided to start with the Disorder Rune. 
You can find the first post in this series here.

I feel that a lot of gamemasters and players see the Disorder Rune as just a source and cause for Misfortune. But I think it has a lot more to offer us other than being the source of ill luck and I want to try to explore that fully here. But let us start off by seeing how Glorantha and Greg Stafford defined Disorder; this will give us a clean base to start from.

Looking at both the Glorantha Sourcebook and the Core Runequest: Role Playing in Glorantha book we come away with a few facts:

  • Disorder was born from chaos and the empty void. 
  • Disorder is said to be the firstborn of the powers and the foundation of the universe
  • The power of Disorder was used to drive off chaos and hold it at bay.
  • Darkness was born from Disorder as it was used to hold chaos at bay. It was the defense that Disorder created Darkness as a defense from Chaos and the void.
  • Disorder is the polar opposite of Harmony. 
  • Disorder is a Symbol of Individualism, of Me and I.
  • Disorder is the symbol of selfish, impulsive, and contrary deeds, thoughts, and words. It is the source of greed and thoughtlessness.
  • Ratslaf was the God of Disorder and Confusion - the personification of Disorder. Called the Dupe of Disorder.
  • Boggles are creatures born from disorder. 
A few things that Disorder is not following the definition of other runes.
  • Disorder is not change or transformation. Possibly only a catalyst for change but change is governed by Movement.
  • Disorder is not War or Conflict. These were the domains of Kargan Tor, who in the God Times was the personification of death. He was the great divider. War is the death of connections. It divides one group from another. One place from another place.
  • Disorder is the lack of Order, of Harmony, but it's not Chaos.

We can also look at its opposite/opposing rune for guidance as well. Harmony suggests Order, Law, Unity, understanding, and balance and so this would lead one to assume that Disorder would be the opposite. Disarray, disorganized, lawless, confusion, instability, and imbalance.

How we can perceive Disorder and use it for our stories.


Disorder is that which makes us Individuals, makes us want to be different from each other. It can be seen as the rebellious spirit that wants to push back and say No when everyone else wants us to follow along and say Yes. These attitudes push back at the harmonious ones that exist in communities, taking the coercion that exists and causing cracks to form. But much like cracks in a bowl can ruin a bowl, these cracks can add beauty and freedom to a community if allowed to exist much like how Gold can be used to fuse the cracks in a bowl together; like you see in Kintsugi. The gold cracks ruin the once perfect unity of the bowl's surface but now add depth and beauty that wasn't there before. Making the bowl unique. 

The individualism that Disorder provides is the source for the Me first; it's egotistical and selfish. When in the place of authority, of leadership, it is pleased as long as it comes first. But when not in a position of power then it is the thorn in the side of those who are.  As much as individuals in a community can be leaders, helpers, and heroes, they can be greedy, gluttonous, have addictions, disloyalty, envious, slothful, etc. Each adds character and personality to the community. And individuals can be both a hero and disloyal. A leader and lazy. They can be harmonious in one aspect of communal life and full of disorder in another aspect. By adding depth to how the Disorder Rune is interrupted, you get a vast array of possibilities that can lead to amazing role-playing moments, and make for great adventure seeds.

Disorder is one of the great motivators for drama within a community and relationships. A misunderstanding between lovers can cause a whirlwind of drama that spirals out of control, even going as far as starting a feud that lasts generations. A member of the community's well-kept secret could lead to dangerous results for everyone. Kin that refuses to help kin or clan can cause lasting harm to trust and bonds. Though Disorder within the community doesn't always have to end badly. What if a member of the communities differences from their neighbors leads them to discover a raid before it happens, saving lives. Or leads a clansman to defy their elder's orders and seek out the help of outsiders, the clan chieftain, etc. There is as much good to be found in Disorder as there is bad - it just all comes down to how you use it and it doesn't have to be only reflected in people. It can appear anywhere, even in nature.

Discord in nature appears when the natural environment acts contrary to what is normal. This could be as simple as two creatures that are normally predator and prey becoming unlikely companions or forming a symbiotic relationship. Disorder can appear in a forest when the complex relationships of the various plants and creatures in the forest are thrown out of balance when one plant or creature dominates the forest. This could be an overabundance of mice, which eat more of the seeds and plants than they normally would, causing damage that wreaks havoc to the whole ecosystem. Disorder can appear when there is an overabundance of snow in the winter which causes flooding in the spring. Or the lack of rain in the winter and spring which leads to a drought in the summer. Or it could cause a dry winter but a wet summer. Disorder in nature likes to keep us on our toes with its contrarian attitude. 

Disorder Adventure Seeds

Below I've written down a few free Adventure seeds that each have Disorder as part of their theme. 

  1. While visiting family in another village, the heroes find their family and other locals acting oddly. Their family members seem to have a difficult time recognizing them and will often forget who they are. While in conversation they will easily lose track of what they are talking about or begin talking about something else that has nothing to do with the original subject. Everyone in the local community is having similar issues and has completely lost any way to get themselves organized or work together. 
    Why is this happening: around the community, hanging from trees are small Wooden Disorder Fetishes, until these are removed and destroyed the community will continue to be affected by Disorder and those who stay too long in the village will join the community n their confusion.
  2. A Farmer has unearthed an ancient urn while digging a new irrigation ditch. The farmer took this home to show his family with plans to travel in the coming weeks, when time allowed, to seek a Priest's advice about the urn - possibly even donating it to the temple and gain some recognition with the cult. However, the family members were often picking the urn up and examining it over the following week. One family member, a small child, who was more curious than the others was examining the urn when the child lost hold of the urn and the urn broke. No one saw the dark thing that was inside the urn escape but not odd things are happening on the homestead. Broken gates, ruined walls, confused livestock, missing food, etc. A Boggle, unknown to anyone, has been set loose, causing havoc in the area.
  3.  The Heroes are at the wedding of a family member when a jilted lover disrupts the ceremony to challenge the bride to a weaving contest to determine who is the most suitable spouse to the groom. The once normal wedding ceremonies are now a heated contest that leaves the groom a prize to be won - no matter what he has to say in the matter.  
  4. Adurisa the Bitter lives on the edge of the village and never rises until well past noon. She waits too late in the day when others are thinking about calling it a day to set out to inspect her crops. Near her home is a small cave where she grows many night crops, such as white asparagus and different kinds of edible mushrooms. Because of the odd hours that she works, she is distrusted by many in the village, a few villagers suggest that she is hiding something in her cave, something that could endanger the village. 

Final Words

I found this topic a lot of fun to ponder over for the last few weeks. I'm looking forward to the next Rune I cover, which might be the Movement Rune but we'll see. During the development of this blog post tried to come up with an encounter for my players that focuses on Disorder and ended up with designing a minor god based on the story, Downboy - which is found in the Stafford Library, the book of Heortling mythology. I'll do a full write-up of this minor god of Disorder and movement that was birthed as a result of Orlanth and Eurmal's actions.

Thursday, October 28, 2021

Runequest: The Runes that Govern and shape all things.

 The Runes that Govern and shape all things


In Runequest, if you haven't guessed from the title of the game, Runes play a significant part in the role-playing game. This is all the more true with the newest edition in comparison to the older editions of the game, where characters have a set of Runes that can influence their character's personality and that the characters can use to affect actions and the world around them. As the game states, "Runes are intrinsic to Glorantha. They are the cosmic powers that define Glorantha and are manifested by the gods".

Rune infuses all aspects of Glorantha, the most ancient gods of Glorantha - each represented or were the manifestation of these Rune. Acos was the God of Stability, Larnste was the God of Movement, Uleria the Goddess of Love/Life, Kargan Tor the God of Death/Conflict, Orenoar the Goddess of Truth, Tylenea the Goddess of Illusion, Harana Ilor the Goddess of Harmony, and Ratslaf the God of disorder. Each balances with the others and ruling the cosmos along with the Elemental deities of Darkness, Earth, Fire, Water, and Air. With their combined power they shaped the universe to create the world of Glorantha. Using their Runes to create something out of nothing - out of the chaos and entropy that existed before exitance began. Further increasing the influence each of the runes had in the universe with the act of creation and destruction. Embedding the runes into everything. 

I've been thinking about the importance and significance of the runes and how they are so intrinsic to Glorantha over the last few weeks. Pondering how to use them in my own games as a building block for storytelling.  In my thinking, a Gamemaster and/or Players can take this knowledge about how the runes interact and affect the world of Glorantha and craft powerful stories for their own games. Much like the Elder gods, both Gamemasters and Players can use a Rune or Runes to add something more to their games; adding significance and weight to the stories they want to tell. But in order for us to achieve this, to be able to use the rune for this purpose, we have to have a good understanding of the runes individually and how they function in groups. The Rune I have been pondering throughout of this and what has led me to write this blog post I feel is a good place to start at exploring these runes and how we can use them for storytelling. So in my next post, I'll be exploring the Disorder Rune and how I might use it for storytelling. Mainly, what creatures, story hooks, items, and social encounters we can build out of them.


I'll leave you with this question; outside of misfortune what aspects of Disorder appear in Glorantha. What kind of things in the day-to-day life of a Gloranthian person would be affected by the presence of the Disorder Rune?


Tuesday, October 12, 2021

Runequest Spirit: The Spirit of Lost in the Dark.

Lost in the Dark

In the most recent game session of Runequest, my group of heroes was escorting an Issaries merchant whose life was under threat by a pack of Baboons (the 6ft tall ones that talk). They had decided that they were going to travel throughout the night to get to Clearwine as quickly as possible. I already knew, as the GM, that the Baboons were not going to attack them on this trip. The Baboons had no idea that they had left and were traveling to Clearwine and by the time they did realize, they would not be able to catch up to the group. To make this journey more interesting I crafted a Spirit Encounter for the group to experience during the night's trip. 

One of the great things about Glorantha is that most things in that world have a solid spiritual connection. Disease in Glorantha is not caused by microscopic lifeforms, they are often caused by Spirits. When the wind blows it's not because of gases moving from high-pressure areas to low-pressure areas. It's because there are Wind Spirits that move to their own rules and myths. So I thought to myself - what if the reason why people become lost in the dar was also because of a spirit who plays upon the mind of the traveler, making them confused and making it difficult to recognize where they are traveling through. In Glorantha there are elemental Darkness spirits and much like any of the other Elemental spirits, there are various kinds that exist. So following that line of thought I used the rules in the Runequest Bestiary to create an unintelligent Elemental spirit for my players to contest against them. This encounter is a Thinking Problem more so than a Fight it Problem. 


Spirit of Lost in the Dark / The Wandering Darkness / Wayward Darkness


Traveling at night is stressful and often dangerous. When night replaces the day, darkness covers the land and the known world changes. Some places that seem pleasant in the light, turn into scary and uncomfortable places in the dark. The natural world can take on a frightening appearance and many creatures, both alive, dead, and spiritual use the cover of night to stalk the land for prey. Campfires and lamp lights only providing a margin of protection and comfort against what awaits in the dark. Traveling at night should be avoided because of the dangers that the darkness represents and veils from sight. 

Only Darkness creatures, such as Trolls, are afforded any comfort in darkness' presence. Trolls know and find comfort in Darkness having been born from it. Their gods exist in that darkness and trolls know darkness for all its shades and depths. So when humans become lost in the dark, trolls know that it isn't just because humans can't see through all the shades of darkness that exist and are confused by the dark beauty that Xentha paints the world in. They know that a Darkness spirit wanders the night making those who cannot see in the dark lose their way.

The spirit of Lost in the Dark is a type of unintelligent elemental spirit of darkness believed to have first appeared during the Great Darkness when Yelm's light chased the darkness and their children to the surface. This darkness spirit will follow any group it finds traveling in the dark, hovering in the air above them. The first sign that this spirit is following any traveler is that the night appears more murky, even during a full moon, and light sources will dim or even extinguish under its chilling influence - a common effect of Darkness Spirits. While traveling with this spirit above them, the travelers will become confused and confounded, finding navigating the dark path more difficult. The spirit will even use its few Spirit Magic Spells to further the traveler's misdirection and confusion. Often this spirit will lead travelers on to a path that leads to danger. It is believed that these spirits feed upon the fear and confusion generated by creatures lost in the dark, but others suggest that they are disordered spirits of darkness whose only purpose is to add disorder to the dark.

Type: Darkness Elemental Spirit
POW: 3D6+6; CHA: 3D6
Spirit Combat: POW x5
Move: 12 (fly)
Spirit Powers:
- Elemental Form
- Affect Environment: Darkness Aura makes the dark seem murkier and confusing within its 12 matter diameter. -30% to any form of navigation or perception check while within the affected area.
- Spirit Magic Spells: Befuddle, Conceal Item, Forget. 
- Darkness Elemental: Any fire, heat, or light source taken within this spirit (and weaker than it) is extinguished by its Darkness. Troll Darksense is not affected by a darkness elemental.


Hope you find this spirit useful. I might put a two-page adventure up on the Jonstown Compendium for this Darkness Spirit if time allows. I'll even make some illustrations so you can see what this spirit looks like with second sight.


Monday, September 27, 2021

Runequest Adventure Review: The Smoking Ruins

 The Smoking Ruins

Artist Jon Hodgson

Overview:


In Hiia's Valley, in the lands of the Pure Horse People and Beastmen, there is a plateau where smoke has blackened the skies and blocking Yelm's light for the last 400 years. Atop the plateau is ancient ruins of a citadel where troll corpses have been burning, unendingly, for hundreds of years. There are whispers about these ruins. Rumors that pass between travelers, stories told to warn those that can hear. They speak of angry, dark spirits haunt the smoke and flames—stories of would-be heroes who venture too close and never return.

The Smoking Ruins is the first of three adventures in the Smoking Ruins and Other Stories Runequest book by Chaosium. Along with these three adventures is information and story hooks for Beast Valley and the South Wilds, lands that lay west of the Colymar tribal lands and outside the Kingdom of Sartar.

The Smoking Ruins is more than a single adventure but a location for exploration and adventure. The information about the ruins is presented so that the GM can use it multiple times. With numerous trips, the heroes can discover more and more about the ruins and the magic that has left a permanent mark in this region. The adventure explores a few different themes such as Companionship, Love, Hate, Devotion, and Loyalty. At times the heroes might find their loyalties in conflict depending on what loyalties they have. Like my own group, some may not even realize a conflict between two or more loyalties exists until the heroes return from their adventure.

That being said, the adventure itself is pretty straightforward and will take several sessions to complete. I like this adventure and all the story elements that it contains. My players and I are looking forward to exploring further the mysteries of the ruins while putting an end to the evil that stains the ancient citadel's. When I ran this adventure, I changed very little from what was present in the book.

As much as I like this adventure, I found this one particularly difficult to run. I read the adventure more than I normally read through any adventure. At the most, I normally read through an adventure twice. I read through The Smoking Ruinsadventure four times and did some additional skimming before each game session to remind myself of key info for that week's session. I'm a minimalistic GM when it comes to prep, so it was very much outside my comfort zone to reread this adventure this many times. The truth be told, normally, I create content for the games I run, but when I started up the Runequest, I wanted to take a break from creating content and wanted to run official content only. I also thought this was a good way to learn how to design adventures for Runequest since the game is very different from what I am used to.

How the book organized the information for the adventure was why I found it difficult to run The Smoking Ruins. There are two sections where the organization and structure make running the adventure a challenge. Out of all of the Acts, these two acts make it difficult to find and match up bits of information - especially during the game itself. But I'll explain this in more detail as we walk through each Act of the adventure.

Trying to Not Spoil this Adventure will be difficult and as such, if you are a player, please stop reading from this point forward. The Surprises in this adventure are well worth discovering during play. If you are planning to run this adventure, please continue reading.

I break down each Act or arch of the adventure below and highlight a few items for a GM to think about while not giving too much away. Afterwhich, I'll list what I added or changed in the adventure that I think improved the adventure overall and helped me run it better. Also, this adventure says it has 5 acts, but I think it's worth breaking one of those acts into two. So below, you'll see 6 Acts; The Festival, The Secret Mission, The Journey, The Ruins, Dancing With Ghosts, and The Return.


Before Act 1, there is a section that gives the GM an overview of the adventure. This section is a barebones look at the various elements of the story. It sets the goals for the heroes. Notes on the pacing of the adventure slowly reveal the various story elements to the players in small chunks. This section gives the GM the history of the Smoking Ruins and some rumors that the heroes might hear about. Some of these rumors and stories are true. At the same time, others are tall tales designed to add confusion. It also covers the NPCs the players will or might interact with during play, some potentially important to the story overall. I only say potentially important because you may not encounter all of them when you run through the adventure. It all comes down to what decisions the players make. For instance, Sara Goodseller is one of the NPCs in the adventures, but her presence is minimal, and my players never encountered her. However, she might be someone who will approach them before their return to the ruins next time.


Artist Jon Hodgson


Act 1, The Festival, sets up the start of the adventure and, hopefully, an emotional hook that may or may not bear fruit for your group of Heroes. The story begins with the heroes at a celebration in Clearwire Fort put on by Queen Leika Black Spear. Here they will make a new friend who will give them their first hints to the adventure that awaits them. I have several things to say about this NPC below, mostly things that I added or handled differently regarding running the NPC. Once they befriend Treya, the Heroes will spend a good portion of the day enjoying her company at one of the local establishments drinking and telling stories. A lot of fun can be had in this first Act - especially once the group starts hitting the wine cups.

GMs should note that this is the first of two sections where the layout makes it a little difficult to run the adventure. Information is presented in an odd, disjointed fashion. For starters, GM only information, description of events, directions on NPC actions and dialogue, and other information are all presented together. One bleeding into the other. One moment you'll be reading the description of an NPC's performance when suddenly GM only information you shouldn't read out loud follows, without any clear break or distinction between the two. It is further complicated when it comes time to find some of those GM notes because you now have to comb through descriptive text and NPC responses to find what you need.

I wish they had broken these down into two sections. The first section tells the GM what the heroes see and hear; NPC dialogue, descriptions of events, etc. While the second section presents the GM notes on various NPC thoughts and feelings and other information that helps run the scene.


Act 2, The Secret Mission, through the NPC, Treya, the Heroes are lead to the Earth Temple and meet Daravala, a Rune Priestess of Ernalda. Daravala has heard from a few contacts about the Smoking Ruins and how there might be a lost shrine to Ernald there. If this is true, she wants to make this year's holy day for Ernalda, which is in two weeks, a special occasion, and wants to surprise the High Priestess with something potentially exciting. However, before she can send an expedition, she needs more info. So first, she hires the heroes to research whether there is any truth to the stories she has heard. Once Daravala has this evidence, she hires the lead an expedition out to the Smoking Ruins to find proof of this lost shrine to Ernalda and return in time for the Holy Day with this evidence. She also requires that the heroes keep this all secret, especially from the High Priestess and Queen Lieka.

Several side stories can be encountered and exposed during this part, which can change and expand the adventure in interesting ways. The heroes can encounter several NPCs as they both gather information and gear. And the GM may even want the heroes to test their loyalties against the secret that Daravala is asking them to keep.


Act 3, The Journey, starts with the heroes taking a slow, rainy boat trip down the river towards Duck Point. If the players are new to Glorantha, Duck Point will be their first experience with Ducks (as in walking talking Donald Duck-like ducks) outside of gooseberry Sprig in Apple Lane. At Duck Point, they discover three potential routes the heroes can take to get to the Smoking Ruins. It's up to the heroes to decide which route they want to take. If they are smart, they will ask around to discover how long each route will take because each route takes a different amount of time and can mean success or failure if the players want to return to Clearwine in time for Ernalda's holy day.

If the GM wishes, the heroes can journey to the ruins narratively with several encounters that the adventure includes or one the GM designed. Or the GM can handwave the whole journey and have them just arrive at the ruins. The adventure gives a few possible encountered to make the journey more interesting. They add interest to the story and the world that the heroes are in. It is better to have these encounters since the heroes can gain awards from their actions after the adventure.


Act 4, The Ruins. The heroes see the Smoking Ruins for the first time and ascend the plateau. At the top of the plateau, they can make several discoveries about the ruins and ancient history before entering the walled citadel.

Here is the second section where the book's layout makes the adventure a little difficult to run. Each area that the heroes can explore has its own section, which is great. However, info for each of those areas can not always be found in those sections. Other sections get into some of the mystery of the ruins, adding layers of info to the various areas as they are encountered. So it is very easy to miss important information or mix up information depending on what the heroes are doing.

An example of this is one of the ways that the heroes can enter the citadel. The first entrance listed is one of the furthest entrances from where the heroes climbed up to the top of the plateau. The other issue is how these are listed on the map. The map uses Numbers, whereas the subheader for these sections uses Letters. It took me a bit of time to work out that Location A was #8 on the map because it's only referenced in the map keys as location A, but while reading the adventure, I wasn't looking at the key but the numbers on the map instead. In any case, don't have two ways to list a location. Either use one or the other - not both. Some descriptive elements for that area are covered under another section and not the "Location A" (or whatever) section.

A good example of this is with "Location A." The first bit of info about Location A is on pg 76. This information includes possible encounters and such. The next set of info about Location A is on Page 83 - this is after several other sections which cover separate areas within the ruins. These descriptive bits can be important to running the game and should have been combined. And this isn't the only point where I had this issue.

Much like in the first Act, how descriptions and GM information flowed together adds difficulties to this section. I had many issues trying to track down info when I needed to answer questions the players had.


Act 5, Dancing with Ghost, sets up the meat of the story and the first big mystery for the adventure, such as why the Smoking Ruins has been burning for 400 years. This Act is broken down into three Parts. The first part is when the heroes first encounter One Eye, the Trollkin Ghost. The second part is when they discover the Mirror Fragment. And the third part is when they potentially get into a fight with some undead.

Part one; here, the heroes meet a Trollkin Ghost by the name of One Eye who needs their help in freeing her family from this curse. She will even lead the players to a place where they can discover what they are looking for if they help her. She is a source of information about the truth behind the ruins, and the adventure gives the GM a lot of information on what kind of questions she can and cannot answer. This ghost only really cares about her family, but to that end, she will help the heroes to the best of her ability if they help her.

Helping One Eye leads to a very contested element of this adventure that many GMs dislike - from what I have seen in the BRP Forums. The heroes learn from the Trollkin what is required to help her - which is performed as a ritual dance. One Eye has developed a ritual that combines Troll magic with what little she knows about the magic placed on the burning trolls in the citadel(Dragon Magic). With it and the heroes' help, One Eye will be able to release the 15 members of her family from the spell - sending them to their place in the underworld. The NPC, the heroes, met at the beginning of the adventure, Treya, discovers something about this ritual that she wants to make use of to make contact with her deceased Grandmother, potentially bringing her Grandmother back to life. The heroes, during the adventure, know how much Treya loves her Grandmother since she speaks of her often. So Treya's motivation should be clear as she tries to twist the Trollkin's blended magic to her own purpose against the One Eye's dire warnings. The Trollkin warns against Treya twisting the spell the way she plans because the ritual that Treya will perform doesn't do what she thinks it does. It is left up to the heroes to decide what they want to do in this situation, which brings us to the crux of the issue I saw online.

Many people online refer to this part of the adventure as being a possible Total Party Kill. They might be correct, but I disagree with them for two reasons.

The Trollkin warns the heroes that they shouldn't let Treya perform the ritual the way she is doing it. So as long as they understand the language the Trollkin is speaking, they are forewarned. Even if they don't understand her words, her body language should be clear IMHO.

The adventure leaves it open for the players to take one of three actions as Treya begins her version of the ritual. They can help Treya and join the ritual dance she is doing - it's similar to the one they were just taught by one eye and can follow her changes pretty readily. They can do nothing and just watch as Treya goes through the motions of the whole ritual. Or they can stop Treya. The adventure leaves it open to the GM if they want both Treya and One Eye's rituals to happen at the same time, as well.

The second reason is something I think some critics have overlooked. If they choose to help Treya and join her in the ritual, there will come to a moment in the ritual where the GM reads the following: "Treya reaches out again, and this time Thinala reaches out as well. They grasp hands. The adventurer should be allowed at this moment to take back their hand. If they choose not to, their ancestor reaches out to grasp the adventurer’s hand".

This moment during the spell is when the GM says, Are you sure you want to continue. If you are a player, you have encountered this often enough by now. GMs have said this type of thing before when the players are pursuing actions with unforeseen negative results. Sometimes they take the warning and change their minds, and other times they decide to continue along the path they have chosen for themselves. The adventure gives the heroes a clear way out in this situation if they want to take it. I will also say that in my games, player's actions can and will have consequences. So I like stuff like this.

Here, Treya will either be lost or kept safe, and it's all down to what the heroes' decide to do in the end. I feel that this is the true heart of this adventure. Treya's love has driven her all her life, and with love, she takes a daring risk to win back her Grandmother's life. Much like the Trollkin's love for her family has kept her ghost sane over the last hundreds of years as she worked to find a way to save them. Much like the artifact of love that the heroes might discover and return to Clearwine with.

Part two happens once the player has either helped One Eye or refused to help her and searched on their own. One area of the ruined citadel appears mostly untouched by the death and darkness that hangs over the whole ruins. Here, they discover, as if waiting for them to bring it forth, a fragment from the God Times, an artifact that was a gift to Ernalda. Up until this moment, the heroes were unsure what they would find in the ruined citadel, and they were unsure if they would return with any good news at all. The artifact they discover turns out to be of far greater importance than they could have hoped for. But now have to survive the ruins of the evil things that lay in wait within its walls.


Part three is the possible fight. The moment the heroes enter the citadel, they can feel a presence within the ruins, something evil and filled with hate that poisons the stone and air of the ruins. Each time the heroes enter a new area, the GM checks to see if Vagargic or its minions have noticed them by making a simple roll. Each time the heroes enter a new section of the ruins, they help the ghost, find the artifact, etc. The chance of discovery rises higher and higher. If they have already helped One Eye and Treya performed their ritual magic and obtain the relic, there is a 100% chance of discovery. At this point, the evil that resides in the ruined citadel knows they are here, and it has plans that it's been waiting to complete for the last 400 years. If it can get just one of the humans, then it has completed its evil plans. But if the heroes are smart, they'll flee the ruins the moment they get a chance.


Act 6, The Return. Once the Heroes have found the artifact that proves that the Smoking Ruins is a sacred site to Ernalda and worth exploring further, it's a race against time to get back to Clearwine. If the heroes are lucky, they will give the artifact to Daravala, who can surprise the High Priestess with their discovery. The adventure results have various effects on what happens when they return to Clearwine and the following holy day celebration. The journey back should be glossed over for the most part except one encounter, but only if the Centaurs were encountered on the way out, to begin with.
This section of the adventure is great because it walks the Players and GM through a holy day celebration. The description paints a beautiful and detailed image of the rituals of a hoy day for the Ernalda cults. Be warned - reading through this out loud is completely worth it and takes roughly about an hour to get through. Each hero will hopefully gain a place within the celebration so that they can feel involved. And if they come back with the artifact, it will make a spectacular showing in the climax of the ritual celebration.


What I would add or change to the Smoking Ruins adventure.

  • Treya of Ezel is a great NPC and she should be introduced to the players as soon as possible. Seasons before this adventure, if you are at all able to do so. I introduced her to my group after the events of The Dragon of the Thunder Hills. She came to them and wanted to write the song/saga of their adventures and their fight with the dragon. She is a huge nerd for all things the Storm Age and so her hearing about the reawakening of a Storm Age Goddess at the end of that adventure will make her want to know more about the heroes and the Queen's Tomb. 
  • Another thing I did with Treya leading into this adventure was to ask a friend to play her in the game, with full knowledge about what was going to happen to the character during the adventure. I know from a wealth of experience from both sides of the GM screen that players are more often saddened by the dramatic loss of a PC than they are by the loss of an NPC, no matter how much they like the NPC, it will never hit them as hard as losing a PC. So I really wanted this experience to be heartbreaking for them and had a friend play the NPC as a player character under the guise of "Trying out the game with an interest in joining" and me lending them an NPC known to the group whose skills could be useful.
    This 100% worked for my group, by the by. They never suspected a thing and were super depressed by the loss of Treya. They were also completely shocked when I revealed what my friend and I had done. It's going to be a while before I can trick again, but so satisfying. On the bonus side though, that friend will be joining us for real since she really enjoyed Runequest and playing with the group.
  • Make Scratches' Map is pretty annoying since the adventures make it sound as if there are many things on that map that the Handout in the adventure does actually have on them. There isn't a great workaround for this and I hope someday We'll get a better version.
  • The boat trip downriver to Duck Point can take between one to two days and since the adventure is all about the heroes being under the pressure for time, I had one of my players make a Luck check by rolling their POW. If it failed then the boat trip took two days, if they succeeded, then the boat trip only took one day. If they had fumbled, then it would have taken three days. maybe some accident happened along the way, like getting stuck on a sandbar, angered a river god, or were attacked by a rogue Broo. 
  • In Duck Point, my players were smart and hired a guide to lead them to The Smoking Ruins. This cost them some money but since they planned for this beforehand, the cost for the guide was included in the funds for the expedition that Daravala gave them.
  • There is a lot of advice to be found online about how to run this adventure. A few posts on the Runequest section of the official Chaosium BRP Forums for instance. One particularly good source I the Jonstown Compendium adventure on Drivethrurpg, "The Duel at Dangerford" by Nick Brooke, has some notes and suggestions that are worth giving a look through.
  • It was only while running Vamargic that I ran into some issues with how the character is presented in the adventure. There are a few facts that are explained about how to run Vamargic. 1) Vamargic is a Spirit that is trapped inside his Burning corpse. 2) Vamargic has the Eye Necklace which imprisons several spirits who can cast Spirit Magic spells for Vamargic. Vamargic can also cast his own Spirit Magic spells by using the MP of the spirits in the necklace. 3)Vamagic has no POW stat. 
    Now here is a question for you. How does Vamargic cast his own Spirit Magic Spells if he has no POW stat? Normally, you would roll your POW stat to cast spirit magic, but without it you don't have anything to base this off of. Also, how does he resist magic as well? Does every spell cast at Vamargic auto succeed? 
    I asked these questions online in a few places and got back some very similar responses. Vamargic is run like a Vamipre, or Undead creatures don't have POW and can't cast Spirit Magic, and several other responses that are of a similar vein. For me, none of these answers work for me and that mainly has to do with the fact that they all ignore many of the aspects that the adventure tells you about how to run the Vamargic NPC. Mainly that he is a ghost trapped in a burning corpse - so not a normal Undead creature, and that he can Cast his "Own" spirit magic spells by using the MP of the spirits in the necklace. The simple answer to the issue isn't to gut parts of the NPC but to assume that the NPC has a typo that left him without a POW stat. Adding a POW stat is the easy fix. Breaking the threat of the NPC by removing half of his power isn't a fix IMHO. Spirits have POW - Ghosts have POW. 
    My solution is to just give Vamargic a POW equal to what is expected of a Rune Lord of his reputation. So at a minimum, he should have a POW of 18. (amendment: See below)
  • Can the heroes defeat Vamargic and end his continued existence in the ruins? There are people of two minds on this subject and it's really up to the GM how they want to handle this. One group thinks that One Eye's ritual has left a hole in the Dragon magic that keeps the troll spirits from moving on. They suggest that this causes Vamargic to pass on to the underworld once he is defeated in battle. So for these people fighting and defeating Vamargic is how you end the curse. This doesn't work for me though since, in my opinion, the magic One-Eye used was only targeted at her family and not Vamargic's forces. Also, once the spell is completed, I believe the way that she opened is now closed again and not just left open forever. So if and when the heroes encounter Vamargic, if they defeat him - he'll just respawn at some point since he and his forces are still bound by the dragon magic. What I plan to do is have the heroes find another way to end the curse. This will give them a lot more to do in the long run. (amendment: See below)
  • Another thing that a GM will have to prepare beforehand is the stats for each of the Spirits bound to the Eye Necklace. The adventure gives you what Spirit Magic Spells they know but not what their stats are. If you have the Bestiary, then just follow the rules for creating spirits on pg 164.
  • There are a few points where the GM has to make up some of the stories that Treya tells about her grandmother and herself. There is not much information given about these stories other than that they involve Tusk Riders. So I wrote up a few for myself. I'll include these below. They are told in the first person as if Treya was speaking. These stories are rough but you can use them if you want in your game.
  • Here are some of Thinala Tindal's history that I patched together from the little information presented about her as well as some that I just made up. Thinala was born in Esrolia in 1562. She fought in the battle of Grizzly Peak and Alda- Chur in 1582. in 1579 she won her right to have a child by undergoing a deadly Ba Beester Gor ritual. In 1600, she was a bodyguard for the Feather Horse Queen's brother, The Sartar Prince Teasarin, and died when a moonbeam caused a stampede of Dinosaurs. Rumors that Queen Lieka has heard suggest that Thinala was somehow responsible for the prince's death. 

Stories of Thinala Tindal of Ezel, The Queen's Defender

  • How an Axe Medien of Babeester Gor won the right to bear a child.
Thinala was with child, this is taboo among the Axe Maidens of the Babeester Gor cult and normally they are put through rites that cleanse their bodies of the child sooner after its discovery. However, Thinala Tindal of Ezel refused the rite, not wanting to lose the last gift from the one she had loved – now gone to the halls of the palace of the dead. She entered the Ax Hall seeking to pass through trails only rumored over and impossible to survive to win her right to bear this child and become a mother. Here she passed the first trial and gained the Blunted Ax. From here she was to follow the hallow halls of death and dark caverns, to find her way in the dark to Babston, a holy place for all Babeester Gor cultists, especially the Ax Maidens. When she emerged from the earth like Babeester Gor did from Ernalda's corpse, she fought her sisters to gain their acknowledgment of her prowess and right to live. Then proved herself again when she sated her thirst with the blood split during the battle – each drop tasting of the sweetest beer to her lips. Her third test was secreted, kept even from me but when she passed through the final test, Babeester Gor appeared before Thinala giving her the Mother's Ax, a mark of the goddess' blessing for my Grandmother to give birth to my mother, Pala of the Orlmarth Clan.

  • Thinala battle's the Tusk Riders.
There she was, Thinala, The Feathered Horse Queen's strongest Defender, separated from her companions and trapped. To her back was a steep drop off down to the Broken River, in front of her was a pack of truth-less Tuskers seeking her blood. They had been raiding the homesteads and towns of Vendref and so Thinala and her companions were sent out from Muse Roost to run these filthy beasts down and place the heads on spikes as a warning to their honorless kin. However, during a night raid, Thinala became separated from her group and lost. The next day, however, the Tuskers from the night before, those who survived, picked up her trail and were running down. Thinalal, wasn't a hot-headed fool and sought out a battleground that gave her the advantage. Unfortunately, the sheep of luck was not with her this day and she found herself in a parlous position. With not but her Goddess blessed ax in hand, she waited to the best possible moment before using the tusker's deadly steeds against them. The foul-smelling beasts didn't know what was happening until the first giant bore dropped, toppled by my grandmother's quick ax strokes to the beasts' legs as she darted under the Tusker's javelins and taunts. When the first Tusker's beast fell, rolling as its legs could no longer hold itself up, confusion rushed through its companions. Once a few of the beasts fell to her attacks, Thinala was able to make bloody work of the Tuskers that fell from their beasts, catching those witless dung eaters flatfooted – removing their heads from shoulders before they knew what danger they had fooled with. If they had known the morning that they were to encounter the Queen's Defender, the Babeester Gor Ax maiden, Thinala Tindal of Ezel, they would have turned a run like the cowards they were. Instead, My grandmother fertilized the soil and feed the river them the gore that she left of their corpses during the short fight. When her companions found Thinala, she sleep among the bodies of the raiders, with a smile on her face from the pleasure of the slaughter. It was said of those who found her that they hesitated to approach because the glow of Babeester Gor was still upon her – the God of Vengeance was surely pleased with the deeds of her beloved Ax Maiden.

Final thoughts

Well, that is everything I have for this one. It was a large adventure and took a lot of time to try and gather up all my thoughts on it in one place. I think it took y group about 6 or 7 sessions to get through the whole, playing about 3 - 4 hours per session. I'm really looking forward to when they return to the ruins and have a few ideas about what they will be doing while there. The group lost one hero to the ritual that Treya performed. They all helped Treya but all but one of them took the hint to stop themselves. For a moment it looked very much like everyone was going to have to make the grandmothers of each of their characters so that they can continue to play. Instead, we had to introduce a grazer to the party while they were still in the ruins. Now the party is planning their first heroquest, seeking to reclaim their lost companions from the underworld.

Amendment

While rereading some of the Smoking Ruins adventure I came upon this following text near the beginning of the book, pg 40, that helps illuminate the issue with whether or not the Atonement magic weakened the Dragonewts magic - making it easier to defeat Vamargic. 

The powerful magic in Vamargic’s necklace did not prevent his physical death but allowed him to escape the full impact of the Dragonewts’ ritual. Vamargic is not trapped as his lesser minions are, and he has created a community of slave troll spirits and skeletons that inhabit the ruins and hunt for intruders, killing them as they are apprehended. Vamargic continues his existence as a ghost, killing any interlopers on what he now considers his domain.

This, for me, hammers home that Vamargic is not undead like a ghoul, vampire, or revenant. He is a ghost. It also shows that he is not fully under the Dragonwets spells - so its fully possible that either 1) even in the unlikely case that he was to atone, it would free him from the ruins, or 2) or that the Dragonewt's spell doesn't bind him solely to the ruins. The necklace seems to be key to his defeat and why he remains, in my mind. But I'll leave you with whatever conclusions you come up with you for your game. 

Sunday, June 27, 2021

Runequest Adventure Review: The Dragon of The Thunder Hills

The Dragon of the Thunder Hills


Overview:

The Dragon of the Thunder Hills is the last of the three main adventures in the GM's Adventure Book that comes with the GM Screen set for Runequest: Roleplaying in Glorantha. This adventure picks up during Fertility Week of Storm Season, which is a season after the adventure; Cattle Raid. Each adventure in the GM's Adventure Book raises the stakes set by the previous adventure and expands upon what game elements and game mechanics are introduced to new players and GMs. This time, one of the players' family members (distant or close) is directly affected by the event that leads into the adventure. It's the inciting incident, as it were, to give the adventure a bit of an emotional connection for the players. 

This gets into one of the themes for Runequest: Roleplaying in Glorantha; the Hero's connections within the world and the people around them. As is said in the Core book, "Gloranthain myth and history are full of intense emotion, which can lead to heights of heroism and depths of tragedy. Love, Hate, Fear, Devotion, and Loyalty are often placed in terrible conflict with one another, as well as challenging personal codes of honor." Every character has a set of passions that shape who they are, what actions they will take, and what challenges they might face. Heroes can push against these or use them to further their own causes throughout the game. The GM can use them to help craft adventures to further those impassioned connections or create conflict and drama; giving players the stakes that make them feel more involved and help drive their character's decisions for good or ill. 

I really love how Passions work and think that even if you don't play Runequest, you should try to bring them into your game. I plan to go more in-depth at a later time about how Passions work and why they make for a better Alignment system for any game. But for now back to the adventure.

There are several tie-ins to this adventure with a few of the rumors and side quests that are in the GM's Adventure Book. A few of these can be introduced prior to the start of the adventure; for instance, the introduction of one hero's family members.

This adventure consists of 5 Acts; the Inciting Incident, Know thy Enemy, the Big Fight, and the Wrap-up. I break down each act below while trying to not give too much away as I highlight a few items for a GM to think about. Afterwhich, I'll list what I added or changed about this adventure that I think improved the adventure overall and helped me run it better.


Act 1 sets up the inciting incident and consists of three key scenes. Scene one starts with the Heroes traveling to Clearwine Fort for an Enarlda Holy Day. it is suggested that each player come up with a reason for why they are going to Clearwine, but the holy days can give reason enough. The scene starts with the Heroes traveling through the Nymie Vale from Apple Lane on their way to Clearwine Fort - which takes a day to travel from one to the other. While in route, the party suddenly spots or hears a Dream Dragon flying overhead, traveling from west to east. There is a series of listening and scan rolls for this and it is possible for some or all of the heroes to fail these rolls. They don't completely miss out on the existence of the dragon if they fail these rolls but are instead taken by surprise as it flies past them overhead. Its at this point the GM informs one of the players that a family member of their hero lives not far from here from the direction that the dragon came from. Fearing the worst, either through anxiety or the hands of fate, the Heroes need to check on the family member's safety, which leads into scene two. In scene two, the heroes come upon a quiet homestead where the family member of the one hero lives in the Nymie Vale. At first, there is no indication that anything has taken place until they investigate the building. Here the heroes encounter survivors of the recent dragon attack and hear their fearful story. Searching will also reveal the bodies of those who were not as fortunate. This is the moment that sets the mood and motivation for the Heroes that will help see them through to the end. The survivors help the GM set the theme of a "familiar environment that has been invaded by an outsider and the safety and peace that environments represent has been shattered". The theme of family, protection, and revenge is a strong emotional stake. A number of characters have been killed in the attack and the reason behind the attack is unclear. The survivors ask that the Heroes to send word to the Queen of what has happened and to take the children to Clearwine Fort, so that they can be kept safe. Scene three has the Heroes continue to Clearwine and inform Queen Lieka of the Colymar tribe and her council of the Dragon's attack in the Nymie Vale. the Queen's council openly speaks in front of the heroes as Queen Leika seeks their guidance. Here they'll ask the Heroes questions to help get a clear picture of the events, all while giving bits of information on what they each know about Dream Dragons to the queen. Though none of them are experts on dragons, they especially don't know much about this one in particular. It is during this that one of the Side Quests is brought up which gives the players some possible direction to go after they gather more information. This side quest involves arms and armor that could be a boon to them in the coming fight.
After speaking for a time with the Heroes and Her Council, Queen Leika sends the Heroes to Tarndisi's Grove to speak with the Dryad - to see if the dryad has any information on this dream dragon and its motives for attacking the Colymar Tribe. She believes being better informed will help them track down the dream dragon and put an end to its attacks. She also asks them to search for signs of this dragon in the Thunder Hills east of the grove, since they will be in that region anyway.
Act 2 is composed of four to five key scenes, the first scene has the heroes gather information about the Dream Dragon at the behest of Queen Lieka by seeking out Tarndisi the Dryad. Tarndisi's grove is in the forest north of Clearwine and is the home of the local elves; the Adryami. This will be the first time for new players to encounter Gloranthain Elves - which are very different from the typical Tolkien-styled elves they are used to seeing in other games/settings. The Heroes will be found and watched by the elves before being approached. Once the elves have followed and watched the heroes for a time they approach and ask them directly why they enter the elven forest. The Elves will lead the heroes to the grove to see the dryad, however, due to her history with humans, she wishes them to perform a task for her first. If they are able to hunt down Redeye the boar and bring back one of his tusks, then she will answer their questions to the best of her ability.

Scene two has a set of named elves lead the Heroes to where Redeye the boar's lair can be found. They will wait a safe distance away, leaving the rest to the Heroes. they will not offer any help or guidance but will wait to either lead them back to the grove or inform Tarndisi of their failure. From here the heroes can approach the challenge in whatever possible way they want.

Scene three has the Heroes, if they are successful, return to the grove where Tarndisi will answer whatever questions they have pertaining to the Dream Dragon in question. If the Heroes ask the right questions they will learn the name of this Dream Dragon and a possible location that they can search. From here the Heroes are lead out of the forest again, in whatever direction they wish to leave. They can search the Thunder Hills, they can return to Clearwine, or they could follow other clues and paths.

Scene four has the Heroes traveling through the Thunder Hills scanning the mountain range for signs of the Dream Dragon just like Queen Leika has asked them to do. Maybe they might even be heading to the place told to them by Tarndisi the Dryad. It's during their hunt in the Thunder Hills that another possible Sidequest found in the GM's Adventure Book is encountered. If the Heroes have not already encountered the band of Dragonewts before now, the heroes do now. The Dragonewts are seeking Heroes to perform a sacred task for them that involves the Dream Dragon in question. It's left up to the players to take the Dragonewts up on their offer. How they answer the Dragonewts can give the heroes an advantage in the coming fight.

They can also use the time between scene 3 and scene five to seek out the arms and armor that the Queen's council spoke of, which lays further north of Tarndisi's Grove.

Scene five is when the players sight the familiar shape of a dream dragon in flight in the distance. The dragon flies around for a moment before landing and the heroes can head in that direction hoping to find the Dream Dragon's Lair at or near this location. This will lead them to The Queen's Tomb and Act 3.


Act 3 is the climax of the adventure. The Heroes Encounter the Dream Dragon, Yerezum Storn. She will first try and charm the Heroes, and ask for offerings. She is very much regal in mind and body and expects to be treated like the Goddess she believes she is. Yes, this Dragon is delusional. Here is where we get into the motivation in the attacks. Yerezum Storn was awakened by the Dragonrise after being asleep for a long time (several hundred years). She found herself in the Queen's Tomb, where in the past the locals worshipped her and come to find that none have come to worship her in centuries. If the players agree to worship her and spread the news of her return, then the attacks will stop. More attacks will happen if she is not worshipped by the tribe and nearby clans in particular.

The players are offered two options here. They can either take up the worship of Yerezum Storn, reviving her ancient EWF (Empire of Wyrm Friends) cult, or they can attack her. Each has its own set of consequences that have long-running ramifications in-game.

However, if they do decide to fight Yerezum Storn and win, they break an ancient magic seal that has imprisoned the original Goddess that Yerezum Storn had believed herself to be. Which again, allows the Heroes to possibly start or reestablish a cult of their own. When the Goddess was released and appeared before the heroes, it was probably one of my group's favorite moments and really hit home the Mythic Age themes of the game. Most adventures don't give you the opportunity to start a religion.
Act 4 is the adventure wrap-up. The players return to Clearwine, if they survived, as Heroes. How the Heroes are received depends on the results, however. Obviously, it will all hinge on how they deal with Yerezu Storn. And much like the previous adventure the type of rewards they gain at the end of the adventure greatly depend on what action the players took and how they resolved the issue of the Dragon.

What I would add or change to The Dragon of The Thunder Hills adventure.

  • Pre-establish the family member beforehand so that the player can establish some connection to this named NPC prior to their death. A good roleplayer can roll with a family member being dropped into play like how the adventure has it happen, but I think it will make it even more impactful for the player if they got to know this NPC before they die.
  • I didn't do this with my adventure but to make it even more evident that the Heroes should check in on the homestead of the one family member, you could have them either Just left the headstead after a short visit only an hour beforehand. Or have the heroes planning to stop at the homestead on the way for a noon-day meal. 
  • I had my players encounter both the Dragonewts and the Tomb of King Berevenenos a season before this adventure. Both are a great way to foreshadow the event of the Dragon of the thunder Hills, especially the Dragonewts. 
  • Keep in mind when running the Dragonewts; They don't follow the same kind of logic that any of the other races follow. The way they both perceive the world and how they think are completely alien. When my players were speaking to Tarndisi, they had asked her about the Dragonewts and their reasons for seeking out human Heroes to perform the task of Liberating a Dream. She told them she didn't know because the only ones who understand why Dragonewts do anything are Dragonewts and Dragons. Even though she has been around since the Dawn she still does not understand their reasoning or actions.
  • The adventure assumes that the heroes are traveling from Apple Lane. However, if this is not the case then it would be fairly;y easy to change the direction they travel and some of the elements around to fi your location. All in all the events do change much if the location of the Dragon's attack changes. 
  • Remember what season it is and describe it appropriately. Storm season is snow and rain in a highland valley. I noted that none of the descriptions in the adventure really described how wet, frozen, or snow-covered anything was. As such when the heroes go to the Homestead in Act one, once they were looking around the exterior of the farm, I had them notice that the patches of snow on the ground were disturbed by a large creature of some sort. They didn't notice this from the front of the building, however, only behind the homestead and the farmland behind it. 
    Doing it this way allowed the opening scene to feel disquiet at first, with no direct sign of trouble as they approached the homestead. It was only when they began searching around the other side of the building that revealed the danger that they just missed.
  • Be sure to not forget about the two children that accompany the Heroes to Clearwine Fort. The end of Act one doesn't include any directions for this, but I assumed the Queen would find a place for the children for the night in the palace until they can be placed with Kin in the city the following day. 
  • There is not any clear direction on what to do while the Heroes are traveling in the forest. It's left up to the GM to decided what to do here with a few somewhat helpful hints. Personally, I had the players encounter a wild animal native to the area and the elves used this to test to see what kind of people had entered their forest. Respectful humans would know better than to hunt a creature under the canopy of the elven forest.
  • When Tardisis sends the heroes to hunt Redeye, I changed up the wording a little bit for my game and had her just ask them to bring her one of Redeye's tusks. She, in no way, directly asked them to fight Redeye. I did this for a few reasons; this left the task open to interpretation but also it allowed one of the Heroes in my game who had almost beaten the giant boar and lost an arm in the fight another chance in the future to try and kill the boar themselves once their arm has fully regrown. This also makes it an interesting test of personality and cleverness if the heroes can find a way to fulfill the task while not directly getting into a fight with the semi divine Beast.
  • When the heroes were taken to Redey's lair, I rolled a die to see if the Boar was awake or asleep. I also randomly rolled to determine if the players were downwind or upwind from the boar as well, giving Redeye the appropriate bonus or penalties to smell their scent.
  • While the Heroes are traveling through the forest and surrounding areas, I try to make them a little more interesting to help foster role-played moments between the players, as well as add more interest to the game. So when the players had left Tarndisi's Grove and were heading out of the forest into the hills, I had a few random noncombat-specific encounters prepared for them. Noncombat-specific encounters are just encounters where the players didn't need to enter combat if they didn't want to. I also used these to help keep the tension on since they didn't know where the dragon was. So every time I had the players make listen check, they almost always were unsure if they were checking to see if it was the dragon or something else. When I use encounters like this I always stick to three or less so that it doesn't become too boring, but also to help keep the players guessing. The adventure calls for a Listen/Scan check to spot the dragon flying nearby, but I think it helps play up the tension if you make the players go through a few False alarms first before they get to this point.
  • When the Heroes are searching the Thunder Hills, as they get closer to the Queen's Tomb, I had my players encounter the burned corpse of a shepherd. The goats or sheep they were herding are gone with little sign of where they went other than scorch marks, a little blood, and the vanishing cloven footprints in the snow and mud. Again, keeping the tension up, but also brought the themes of family and community back to bare. What do you do with the body of someone's kinsmen? Do you leave them or do you try to return them home. My players came back for the corpse after their battle with Yerezum Storn and sought to return the poor herdsmen back to their kin. We got some good RP out of it and it helped establish more of the setting. I also gave extra Rep for this and the person's kin did reward them with a percentage of the Herdsmen's ransom for bringing the corpse back.
  • If you are new to Glorantha, reading up on the Empire of the Wyrm Friends is a great help during this adventure. Even if it's just snippets of information. The EWF comes up often and Yerezum Storn and the Queen's Tomb have ancient connections to them. The more you know the more likely you can give the players answers to some of the questions they might ask.
  • The map of the Queen's Tomb has one mistake that I notice during the game. There is a set of Orlanth and Ernalda Pillars described for room five that are actually supposed to be in room 6. The Map has them depicted in room 6 (so in the correct room). Just keep an eye out for that and adjust appropriately.
  • When I ran this for my players they easily took Yerezum Storn down. She never had a chance. If I was to run this again, I would give her Dispell 2 or even use Dragon Magic to dispel magical effects. My Players locked Yerezum Storn down within two rounds of combat. Starting off by hitting her with both a Demoralize and a Slow spells all while using an illusion to keep her preoccupied with the inability to use her breath weapon. 


We finished up with the main adventures in the GM's Adventure book and have just started the Smoking Ruins, so its going to be a bit of time before the next Adventure review. Already I have a long list of items I want to talk about when it comes to the Smoking Ruins adventure, so I'm looking forward to getting into that one.